Cobra Helicopters Predator Turbine Design
1992: Welcome to the Turbine Age
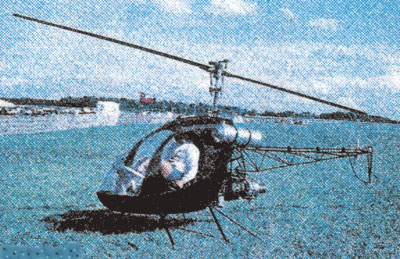
Predator Turbine Helicopter: One of the first ever turbine powered “kit” helicopters
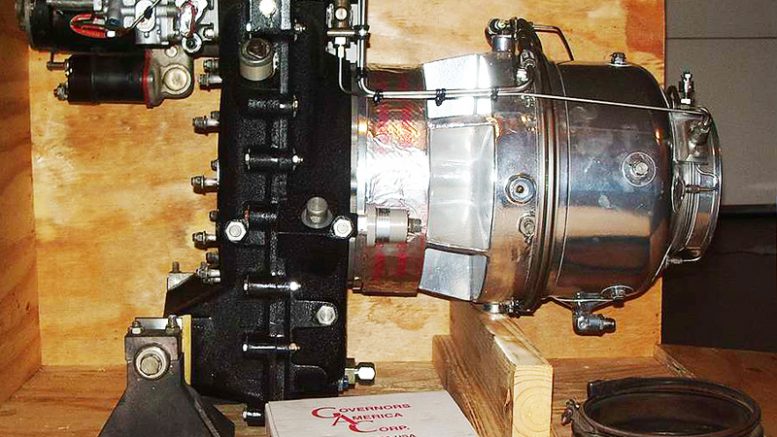
Cobra Helicopters first introduced their single seat turbine powered Predator kit helicopter at Oshkosh in 1991. The Predator kit helicopter went through a thorough flight testing program while determining the viability of incorporating turbine power into a kit helicopter design. It was finally released to the public in 1992. The Predator helicopter is the first helicopter kit intended for turbine power; a 95 HP Solar T62T-2A1 APU turns the rotors giving it a respectable 95mph cruise speed.
As can be seen here, Cobra Helicopters were well ahead of the market having conceived a kit helicopter utilizing turbine power well before the Mini 500 conversions, including the Rotorway Jet Exec, Turbine Angel CH-7, Rotormouse, Helicycle and now Mosquito turbine powered helicopter.
Very little is known about this revolutionary addition to the Cobra Helicopters kit built helicopter range. The Predator’s airframe is based on the original Mustang helicopter’s all welded chromoly steel design and uses a gear driven main rotor transmission system along with a shaft driven tail rotor system.

Predator Turbine Kit Helicopter Cockpit
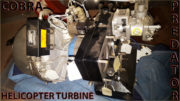
The Solar APU turbine outputs its power through a reduction gearbox before transferring drive via belts to what appears to be an unusual alloy three way main rotor gear box with tail rotor output directly opposite the input shaft. This actually resembles an automotive differential gearbox with what would be the driveshaft input pointing vertically.
Although the main rotor blades and tail rotor blades remain the same, the landing gear has been modified from the Mustang design for better ground clearance. The Predator also sports a stylish cabin once again sticking with Helton’s idea of comfort, streamlining and visual appeal.
Predator Turbine Powered Kit Helicopter
Press Release (1992)
Gary Helton of Cobra Helicopters has announced the availability of their new kit-built turbine powered helicopter, the Predator. The Predator is unique in that it utilizes a gas powered turbine engine along with conventional drive train and helicopter controls while maintaining a very inexpensive price for the average person. The kit helicopter comes complete with engine and all components ready to bolt together. After spending a few weeks assembling the Predator you will be ready for the exciting world of helicopter flight.
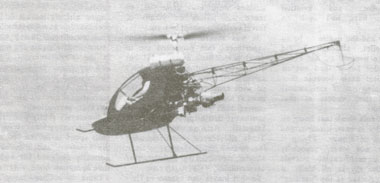
Flying The Predator Turbine Helicopter
You will be able to fly the helicopter out of your back yard and reach a top speed of 95 mph while you drop down to follow rivers and beaches or zip across tree tops.
The versatile and sleek Predator kit helicopter, with its reliable, fully governed gas turbine engine will provide you with good viability, maneuverability, economy and pure flying fun. All this for an affordable price of $25,000 USD, complete with engine. (Editors note: NO LONGER AVAILABLE)
Footnotes: As you can see by this and other designs presented here on our website, there have been many companies and designs that have simply vanished because of various reasons but mainly due to the market demand at that time.
As history has shown us there was little interest in such features then where as now, turbines are all the rage in helicopters? There were many forums discussion the viability of such an engine being used for a kit helicopter – mostly “against”. In those days, free shaft turbines were the only ones though to be viable helicopter engines. Now, things are very different, take the Helicycle helicopter, the Mosquito helicopter (both started their lives with 2-stroke engines), the Wasp experimental helicopter (company also closed) and even now the Jet Exec Rotorway conversions the Angel CH-7 helicopter conversions and of course the Mini 500 conversions.
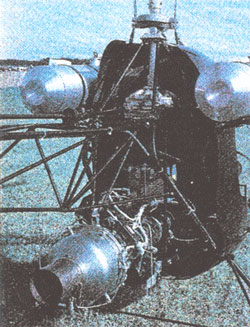
Predator Kit Helicopter Turbine Installation
It seems unfortunate that we have lost such an innovative design with features we now dream about. Obviously they were very forward thinking people, only they were just a little ahead of their time without even realizing it.
For example, this is as close to a commercial helicopter most of us would have ever come to owning, complete with turbine power and reliable construction methods still used in the aviation industry today. Yet how many Predator helicopters have you seen flying? How much exposure did you see in the major aircraft publications or on the news and in the media.
Today thankfully the internet gives much assistance in providing the information we now seek with relative ease. It also allows for a more widespread advertising option where aircraft like these are more likely to find a successful market due to international exposure.
Please note, Redback Aviation has no other information or parts etc… available for any of the Cobra Helicopter range. This story has simply been presented here for historical and information purposes only. If you have any information on these helicopters or knowledge of anyone who owns one, please contact Redback Aviation so that we me share it with the rest of the experimental helicopter community.
Editors note: Cobra Helicopters originally offered a very boxy and angular looking two seat helicopter that somewhat resembled the Rotorway Scorpion helicopter though with a triangulated tail boom. The helicopter was powered by a converted Mazda Rotary engine that operated at around 5500rpm providing a lot of power. The airframe appeared to be of typical chromoly steel airframe along with a “duck-bill” style cabin also similar to the Rotorway Scorpion helicopters.
It was of standard configuration with primary clutchable V-belt reduction drive to the main rotor gearbox. It supported a shaft driven tail rotor and used the basic swash plate control system. All later models use the Commuter helicopter/Baby Bell helicopter/Safari helicopter transmission system.
Unfortunately I no longer have that information or any pictures of this design. I tried for many years to track down more information on the company and design. At one stage I came across a gentleman who sent me an in-depth email on Cobra Helicopters and it’s origins also noting that it was sold off I believe to an unknown Italian company and that the "design brains" behind these helicopters was a business partner of Gary Helton.
I have never been able to locate that email since I first received it (about 3 computers and many years ago). If anyone feels they can contribute to this or any article, please use the contact page.

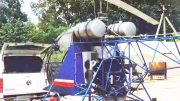
Cobra helicopter’s Predator Turbine kit helicopter taxiing for flight
Below contains the last know manufacturers construction information available on the Cobra helicopter, Mustang helicopter and Cobra Predator helicopters.
Please note: This information is provided for historical and educational purposes only. The Cobra Helicopter Company closed its doors many years ago and are no longer contactable. The various Cobra Helicopter designs presented here are no longer in production and there are no known parts available though the as per the article, one uses the Helicom Commuter or more recent Safari Helicopter running gear.
Over the years I have only ever seen 3 references to these helicopters. One was the sale of the last of the two seat helicopters built in composite materials, another was for the sale of the prototype single seat Predator turbine powered helicopter and the last – a reference to the Predator helicopter flight demonstration at either Sun and Fun or Oshkosh?
Also note that this is only a small collection of reproduced photocopies being the last known remaining information pack on the Cobra, Mustang and Predator helicopters and as such, the photographic quality of the pictures is quite poor.

Cobra Helicopters’ single-seat, kit-build Predator has begun test flights powered by a 95-hp SolarT62T-2A1 turbine.
engine
JANUARY 1992: When we featured Cobra Helicopters’ single-seat Predator in our Oshkosh coverage, it had not yet flown powered by its 95-hp Solar T62T-2A1 turbine engine. It has since flown successfully. Kits, including engines, are priced at $25,900.
There is plenty of good textual information for you to read on the design and construction of the Cobra range of helicopters.
A great resource for the homebuilt helicopter experimenter.
IMPORTANT NOTES THIS INFORMATION!
▣ This information is copyright protected!
▣ These ARE NOT construction drawings.
▣ ALL DIMENSIONS are in US imperial measurements for the Cobra Information Pack.
▣ We DO NOT offer ANY technical support for the helicopter or the drawings/info pack.
DISCLAIMER: The Cobra Information Pack is presented for historical purposes only.
Mustang Helicopter Construction Manual
Introduction
This construction manual is meant to accompany the Mustang helicopter plans and is solely written to assist in the construction of this helicopter.
This manual follows the plans by page numbers and tells you to refer to certain pages. Where it states a CM number, this page is in the helicopter “C”onstruction “M”anual. You may find that other pages of the plans not mentioned may also assist you in fully understanding the building process. This is not a difficult kit to assemble by any means. Please take your time to do a good job as it will more than pay for itself in the great appearance and even greater performance.
Before beginning any construction sequence, read it through first and familiarize yourself with the assembly and suggested procedure. Please build your helicopter as our plans show. If you feel there is an error or a change needed, please contact us before you make the change. This manual is not a “Bible” that must be followed word for word. Instead it will give you suggestions and a place to start.
As you build the airframe, do not cut up a lot of chromoly tubing in advance, cut as you go. Do not completely weld a tube until you complete all tack welding at that point, then weld the entire cluster together. Also, you may want to squirt some anti-rust oil inside the tubing away from the weld point for long lasting rust protection.
If you cannot weld, you should teach yourself well enough to tack-weld. With this you can at least fit and tack all the parts together, then have an experienced person weld for you. They do not need to be a certified welder as the helicopter is classed in the “experimental” category.
Do not substitute any lower grade tubing or hardware store bolts for any part of the helicopter. The 4130 chromoly aircraft grade tubing is self-explanatory, and the assembly hardware – cheap store bolts are good for use while welding assemblies together. Be sure though that only aircraft grade bolts are used in the final assembly. Check, and recheck – your life may depend on it.
Main Airframe
It’s best to set up the airframe on a flat, level sheet of 3/4 inch plywood. If you mount this on a set of saw horses, be sure that the board is level and does not sag anywhere. HINT: lay out the outline of the plans on the board with a pencil. Include all tubing lines drawn to exact as possible. Mistakes “here” can be erased. Lay out the side tubes first. Cut these long, as they can be shortened later. Make up a bunch of wooden blocks and nail them to the board to hold the tubes in place – creating a temporary “jig”.
The next step is to make the transmission mount as shown in the plans page. NOTE: Only make the outside of the mount of the four (4) one-inch X .035 tubes welded in a trapezoid as per plans, the inner tubes that hold the transmission will be welded later.
The next step is to pre-bend side tubes onto the airframe board, C-clamp the tubes to the wooden blocks at the right dimensions near sta-7. Install upright 2X4’s at sta-60 to keep the aft part of these tubes at sta-0 to a 45 degree angle and cut and fit cross tube at sta-0, tack weld this in place. Next at sta-70 on the side tubes, measure up 32 inches from the airframe board and use a level to scribe a horizontal line to attach the transmission mount. NOTE: Be sure the jig is level in all directions. Cut and fit this scribed line to attach the main rotor transmission mount.
The next step is to cut and fit the two upright sides that begin at sta-39-wl-10. Cut and fit these uprights to the main transmission mount, make sure that the transmission mount is level in all directions. Now tack weld the two (2) upright tubes and the two (2) side tubes to the helicopters main rotor transmission mount.
The next step is to attach the rest of the cross tubes in the main airframe except for the cross tube that holds the rudder pedals. You can now tack weld these tubes in place. HINT: When welding on the jig, a sheet of aluminum sheet under the joints will protect your jig from burning, if you use the aluminum as a heat sink, be careful not to upset the levelness of the tubing and jig.
Next cut and fit the diagonal upright tubes that start at sta-14.5 and end at sta-70, tack weld in place. Next cut and fit lower seat support in place and tack weld on assembly. Also drill and weld in the bushings for the upper seat support brackets. See spacing on the top view of the airframe plans at wl-34.
Next install tabs for tail boom connections, fuel tank brackets, rudder pedals push-pull cable. Also weld in the tabs for the cyclic push-pull cable.
Please note: All information is © international copyright protected and not available for re-distribution. Offenders will be prosecuted to the full extent of the law. All information remains the property of Redback Aviation and may not be copied, altered, re-sold, manipulated, posted for public display or otherwise. All information is provided for educational purposes only. You understand and agree that Redback Aviation and all of it’s related persons are in no way responsible or liable in relation to the information supplied, presented or otherwise implied. While this manual does display some machinist drawings along with dimensions and parts lists, it is not being presented as a complete “plans package”. *The ability to manufacture all parts excludes main rotorblades, seat tank and cog belt drive pulleys which can be purchased separately. Most other items can be manufactured by any reasonable machine shop.
NOTE: The Cobra Helicopter Company is no longer in existence and their Cobra, Mustang and Predator helicopters are no longer in production. Article date 1990 courtesy Norm Goyer.



Be the first to comment on "Cobra Helicopters – Predator Turbine Helicopter – Predator Kit Helicopter"